How to Lay Garden Sleepers in 10 Easy Steps
To lay garden sleepers, start by choosing durable materials like hardwood or concrete that suit your style and upkeep needs.
Garden sleepers are a great way to create sturdy edging or raised beds, so picking the right type is key.
Next, measure and mark your edging area carefully.
Then clear and level the ground to prepare it for installation.
Dig a trench about 10-15 cm deep, which will give your sleepers a solid foundation.
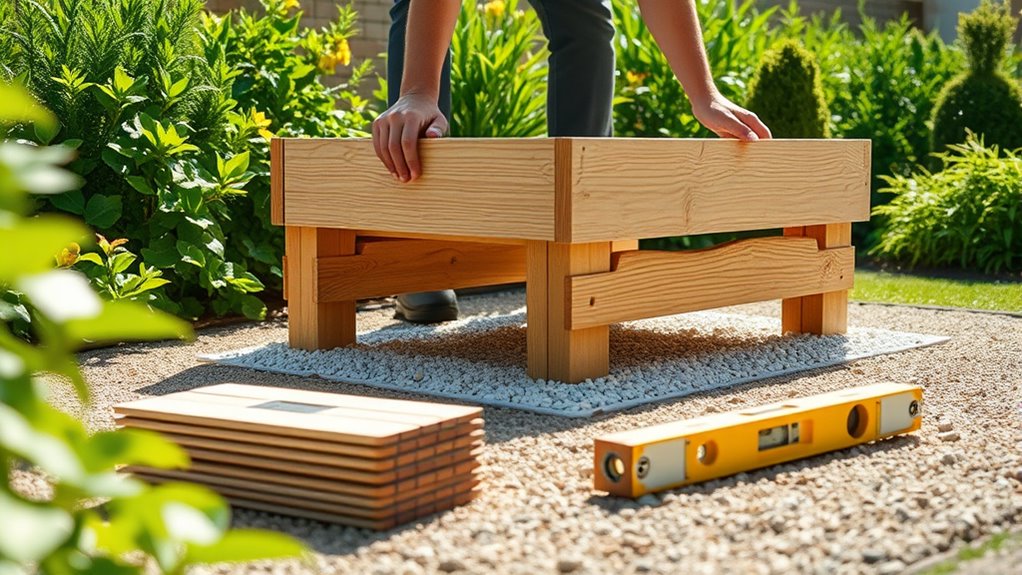
Add a stable base using gravel or sand to ensure proper drainage and stability.
Position the sleepers carefully in the trench, making sure they line up nicely.
Secure them with corrosion-resistant screws to keep everything in place.
Don’t forget to treat wooden sleepers for longevity—it helps protect against weather damage.
Backfill the trench with drainage material and soil to finish off.
Finally, maintain your garden sleepers regularly to prevent damage and keep them looking great.
Keep going to uncover tips for a flawless, lasting finish!
Key Takeaways
- Choose durable sleepers like hardwood or concrete based on maintenance preference and garden style.
- Measure and mark the area, then dig a 10-15 cm deep trench for stable sleeper placement.
- Lay a waterproof membrane and a gravel or sand base for drainage and stability before positioning sleepers.
- Secure sleepers with corrosion-resistant screws and apply wood preservative for long-lasting protection.
- Backfill with free-draining aggregate and soil, maintain proper drainage, and perform regular inspections and treatments.
Choose the Right Type of Garden Sleepers
When choosing the right type of garden sleepers, you’ll want to take into account durability, maintenance, and appearance. Wooden sleepers offer a natural appearance that blends beautifully with garden landscaping, especially hardwood sleepers known for their rot resistance and longevity.
If you prefer something low-maintenance, concrete sleepers provide excellent durability and resist decay, with textured finishes that mimic timber’s look. Pressure-treated sleepers are another great choice, especially if your sleepers will be in constant soil contact—they resist decay and can last 15 to 30 years.
Each type suits different needs, so consider how much upkeep you’re willing to do and the style you want. By selecting the right sleepers, you guarantee your garden landscaping remains both functional and visually appealing for years.
Measure and Mark the Edging Area
Start by sketching your garden layout to visualize where the sleepers will go and clearly define the edging boundaries. Next, measure the total length of the area where you plan to install the sleepers, including any curves or angles in your design.
Use stakes and string to mark the edging line on the ground. This will guide you to place the sleepers straight and keep a consistent border.
Decide whether your sleepers will be laid horizontally or vertically, and pick the right size for your layout and function.
Finally, double-check all your measurements and markings to guarantee everything’s accurate before moving on to ground preparation. Taking these steps ensures a precise and tidy edging that really enhances your garden’s look.
Gather the Tools You’ll Need
After measuring and marking your garden edging, gather the tools that will help you lay the sleepers accurately and securely. The essential tools needed include a spirit level to keep each sleeper perfectly straight and a tape measure for precise dimensions.
For cutting sleepers to size, prepare a crosscut saw or handsaw. You’ll also need a drill with wood drill bits to pre-drill holes, ensuring your screws or landscaping spikes hold the sleepers firmly in place.
Don’t forget gloves and goggles for safety when handling heavy materials and power tools. Finally, have a shovel ready—it’s indispensable for clearing and leveling the ground surface before installation.
With these tools gathered, you’ll be set to lay your garden sleepers efficiently and with confidence.
Clear and Prepare the Ground Surface
Start by removing all vegetation and debris to create a clean, clear area for your sleepers. Then, level the soil carefully and compact it to provide a stable base.
Taking these steps guarantees your sleepers will sit firmly and last longer. It’s all about setting a solid foundation right from the start.
Remove Vegetation Thoroughly
Before laying your garden sleepers, you’ll want to remove all weeds, grass, and debris to create a clean, level surface. Start by removing vegetation thoroughly, clearing away any roots and stones that might interfere with sleepers in place.
Use a spade or shovel to dig your trench about 10-15 cm deep, ensuring you’re preparing the ground properly. After clearing, rake the area to produce level ground, which is essential for stability.
To keep your layout organized, mark the trench outline with stakes and string before digging. Taking these steps will help you clear and prepare the ground efficiently, making it easier to lay your garden sleepers evenly and securely.
Level And Compact Soil
Once you’ve cleared the area of vegetation and marked your trench, focus on leveling the soil to create a flat, even surface for your sleepers. Use a shovel to remove uneven soil and dig a trench 10-15cm deep if needed.
Make sure to confirm the trench bottom is level with a spirit level. This helps assure proper sleeper placement.
Next, compact the soil thoroughly with a tamper or plate compactor. This creates a stable base that prevents settling.
| Task | Tool Used |
|---|---|
| Level soil | Shovel & Spirit Level |
| Dig trench | Spade |
| Compact soil | Tamper/Plate Compactor |
Proper leveling and compacting guarantee your sleepers sit firmly and evenly. This creates a durable garden structure.
Dig a Trench and Lay a Stable Base
You’ll need to dig a trench about 10-15cm deep and wide enough to fit each sleeper snugly. Make sure to choose the right base material, like gravel or sand, to provide good drainage and stability.
Use a spirit level to keep the trench even, so your sleepers sit straight and secure. It really helps to take your time here to get everything just right.
Trench Depth And Width
Dig a trench about 10 to 15 cm deep—roughly half the height of your sleeper—to keep it stable and prevent shifting over time.
Make certain the trench width is slightly wider than your sleeper, adding about 5 cm on each side to give yourself room for easy placement and adjustments.
Once you’ve dug the trench, compact the bottom thoroughly to create a firm, stable base. Lay a waterproof membrane along the trench’s base to protect your sleeper from moisture and reduce the risk of rot.
Before placing the sleeper, use a spirit level to check the trench floor is perfectly flat and even. This careful attention to trench depth and width guarantees your sleepers remain secure and long-lasting in your garden.
Base Material Selection
Although preparing the trench is essential, selecting the right base materials guarantees your sleepers stay stable and dry over time. Once you’ve dug your trench about 10-15cm deep, compact the bottom firmly to create a solid foundation.
Next, lay a layer of gravel or MOT Type 1 in the trench; this improves drainage and prevents moisture buildup around the sleepers. Adding a waterproof membrane beneath the sleepers further protects them from soil moisture and potential rot.
Finally, spread sand over the gravel to create a level surface, ensuring your sleepers sit evenly without shifting. By carefully choosing and layering these materials, you’ll provide a durable, well-drained base that extends the lifespan of your garden sleepers.
Ground Leveling Techniques
Before setting your sleepers in place, make sure the trench is properly leveled and stable. Start by digging a shallow trench about 10-15 cm deep to give yourself a solid foundation. Use a spirit level to check that the trench bottom is flat and even. This step is really important for proper sleeper alignment.
Next, compact the soil firmly so it won’t shift once the sleepers are laid. Adding a layer of gravel at the base is a good idea too, as it helps with drainage and keeps things stable. After you position the sleepers, backfill with soil or free-draining aggregate to lock them securely in place.
- Dig a shallow trench 10-15 cm deep
- Use a spirit level to confirm evenness
- Compact the soil at the trench bottom
- Add a layer of gravel for drainage
- Backfill with soil to secure sleepers
Position Garden Sleepers and Check Levelness
Start by positioning the first garden sleeper carefully within your designated area, making certain it aligns perfectly with your marked outline to guarantee a clean edge. Use a spirit level to check that the sleeper is perfectly horizontal; adjust by adding or removing substrate beneath it as needed.
This secures a flat base for all the sleepers you’ll lay next. As you position each subsequent sleeper, overlap their ends by at least 15 cm to create interlocking joints that enhance stability.
Regularly re-check the levelness of each sleeper to maintain uniform height across your garden edging. Taking time to position sleepers accurately and check their horizontal alignment will give your garden a neat, professional finish and secure long-lasting stability.
Secure Garden Sleepers With Screws or Anchors
Once you’ve positioned and leveled each garden sleeper, securing them firmly with screws or anchors will lock everything in place and prevent shifting over time. To guarantee a secure connection, use corrosion-resistant screws like stainless steel or galvanized ones.
Always pre-drill holes to avoid splitting, especially with hardwood sleepers. For extra stability, metal brackets can reinforce corners and joints.
Regular maintenance is key—check and tighten any loose screws or anchors to keep your garden sleepers solid and safe.
- Use landscaping screws or spikes at least 10-15 cm long
- Pre-drill holes before inserting screws
- Choose corrosion-resistant screws for durability
- Reinforce joints and corners with metal brackets
- Perform regular maintenance to tighten fasteners and inspect sleepers
Treat Sleepers to Keep Them Lasting Longer
To keep your garden sleepers lasting longer, you’ll need to apply a high-quality wood preservative and stick to a regular re-treatment schedule every 1 to 3 years.
Don’t forget to treat any freshly cut or drilled areas immediately to prevent moisture damage. These steps will protect your sleepers from rot and insect damage, extending their life considerably.
Wood Preservative Application
Applying wood preservative to your garden sleepers before installation can extend their lifespan by up to 30 years by preventing moisture absorption. This treatment protects the wood from rot, especially in areas with direct soil contact.
To maximize rot protection, use a breathable wood stain or exterior wood oil, which also guards against UV damage. Treat any freshly cut or drilled spots immediately to avoid vulnerability.
Remember, avoiding non-breathable paints is essential, as they trap moisture and accelerate decay.
Key points for wood preservative application:
- Apply preservative thoroughly before laying sleepers.
- Use microporous wood stain or oil for breathable protection.
- Treat cuts and drill holes promptly.
- Focus on timber faces exposed to moisture and soil.
- Avoid non-breathable coatings to prevent trapped moisture.
Regular Re-Treatment Schedule
Although garden sleepers are designed to be durable, you’ll need to re-treat them every 2 to 3 years to keep rot and insect damage at bay. Establishing a regular re-treatment schedule with wood preservation treatments greatly extends the lifespan of your railway sleepers.
Pressure-treated sleepers naturally resist decay but still benefit from maintenance. Each year, inspect sleepers carefully for signs of wear or damage and apply treatments promptly.
For sleepers in direct soil contact, install a waterproof membrane to reduce moisture exposure and prevent decay. Following these steps guarantees your sleepers stay strong and attractive.
Staying consistent with re-treatments and inspections helps you avoid costly repairs and keeps your garden structure safe and long-lasting. It’s really worth the effort!
Protecting Cut Ends
When you cut garden sleepers, you expose fresh wood that soaks up moisture quickly. This makes it vulnerable to rot and decay. So, protecting cut ends is key to extending your timber’s lifespan.
Right after cutting, apply a wood preservative that penetrates deeply. This seals the exposed fibers and helps reduce moisture absorption. It basically shields the wood from fungi, insects, and environmental damage.
To keep the protection going, make sure to reapply treatments every 2 to 5 years. These cut ends are especially vulnerable, so don’t skip this step. Also, think about installing a damp-proof membrane or leaving a gap between the sleepers and soil. This will help minimize moisture contact.
- Apply preservative right after cutting
- Choose a deep-penetrating wood preservative
- Reapply treatments regularly for lasting protection
- Use a damp-proof membrane under sleepers
- Maintain airflow to reduce moisture absorption
Backfill With Drainage and Soil
Start by backfilling behind the sleepers with a 100-150mm layer of free-draining aggregate. This helps improve drainage and protects the timber from rot.
Lay a weed membrane against the sleepers before adding the aggregate. This prevents weed growth while still allowing water to pass through.
Place a weed membrane by the sleepers to block weeds while letting water flow through.
Next, add topsoil in layers over the aggregate. Lightly compact each layer to avoid settling and keep everything stable.
Make sure the backfill slopes slightly away from the sleepers. This will direct water away and boost drainage.
Properly compacted soil not only supports the sleepers but also keeps your garden neat and functional.
Keep an eye on the backfilled area for any settling. Top up the soil as needed to maintain consistent height and support around your garden sleepers.
Maintain Your Garden Sleepers Over Time
To keep your garden sleepers sturdy and looking their best, you should regularly check for any signs of movement, leaning, or loose fixings. This helps maintain your garden sleepers over time and guarantees their structural integrity.
To extend the lifespan of your sleepers, apply wood preservative treatments every two to three years. Also, keep an eye out for cracks and treat small damages promptly to stop bigger issues from developing.
Maintaining good drainage behind the sleepers is essential. It helps avoid moisture buildup and wood decay.
Here’s how to care for your sleepers:
- Inspect for movement, leaning, or loose fixings regularly
- Apply wood preservative treatments every 2-3 years
- Clean surfaces with a stiff brush to remove debris
- Monitor for cracks and treat early
- Guarantee good drainage using gravel or perforated pipes
Frequently Asked Questions
Can You Lay Sleepers Directly on Soil?
Yes, you can lay sleepers directly on soil if the ground is level and compacted. You’ll want to dig a shallow trench and use a waterproof membrane to prevent moisture and rot for long-lasting results.
Should Sleepers Be Laid on Sand or Gravel?
You should lay sleepers on gravel, not sand. Gravel drains better, preventing moisture buildup that rots wood. Plus, a compacted gravel base keeps your sleepers stable and long-lasting, giving your garden a solid foundation.
How to Join Sleepers in a Straight Line?
You join sleepers in a straight line by overlapping their ends 10-15cm, pre-drilling holes, then screwing them together with heavy-duty wood screws. Use a spirit level to keep them aligned and add metal brackets for extra strength.
How to Lay Sleepers as Steps?
Don’t beat around the bush—lay sleepers as steps by digging trenches, ensuring each is level with a spirit level, overlapping ends, and securing with screws or spikes. Add gravel beneath to keep things solid and drain well.
Conclusion
By following these simple steps, you’ll have garden sleepers so sturdy and perfect, they’ll look like they’ve been there since the dawn of time. Just take your time, treat them well, and keep an eye on maintenance.
Before you know it, your garden will be transformed into a stunning haven that’ll make your neighbors green with envy. Remember, a little care goes a long way in making your sleepers last forever!
Regular maintenance is key to preserving the strength and beauty of your garden sleepers. With proper care, your sleepers will enhance your outdoor space for years to come. So, enjoy the process of laying your garden sleepers and watch your garden turn into a charming retreat that’s both functional and visually appealing.