How to Make a Raised Garden Bed in 7 Easy Steps
To make a raised garden bed in seven easy steps, first measure and mark your lumber accurately. Getting precise measurements is key to a sturdy frame.
Next, cut the boards and corner supports to size.
Drill pilot holes to prevent the wood from splitting.
Then, assemble the shorter sides using corner posts for extra stability.
After that, attach the longer boards, adding extra support if needed.
Line the bed with hardware cloth to keep pesky critters out.
Once that’s done, position your garden bed in a sunny spot where your plants will thrive.
Finally, fill it with quality soil and compost to give your plants the nutrients they need.
Follow along to uncover more tips for creating a thriving raised garden bed you’ll love!
Key Takeaways
- Measure and cut lumber to create a frame, ensuring shorter sides are 3 inches less than the desired width for proper assembly.
- Drill pilot holes and assemble the frame using 4×4 corner posts and deck screws to secure square and stable corners.
- Attach long boards to the shorter sides, add middle supports if over 6 feet, and line the bottom with hardware cloth for pest control.
- Choose a sunny location with good spacing, prepare a level base, and secure hardware cloth edges underground to prevent pests.
- Fill the bed with a quality soil mix of organic matter, sharp sand, and topsoil, then add compost and mulch for soil health.
Measure and Mark Raised Bed Lumber
To begin measuring and marking your raised garden bed lumber, decide on your bed’s dimensions—typically 4 feet wide by 8 feet long. Keep in mind, the width shouldn’t exceed 4 feet so you can easily reach the center.
Use a measuring tape to measure each piece of lumber carefully. Remember, the shorter sides should be 3 inches less than the intended width to guarantee proper assembly.
Measure each lumber piece accurately; shorten the sides by 3 inches for perfect fit and assembly.
Mark your cutting lines clearly on the lumber using a pencil, paying close attention to precision. Double-check all your measurements before moving forward to avoid mistakes and wasted materials.
Once you’ve marked everything, consider labeling the boards to keep track of which pieces will form the shorter and longer sides. Accurate measuring and marking really set the foundation for sturdy raised garden beds.
Cut Lumber to Size and Cut Corner Supports
After measuring and marking your lumber, it’s time to cut each piece to size using a miter or circular saw. Make sure the shorter boards are 3 inches less than the bed’s width for a perfect fit.
Cut corner supports from 4×4 redwood posts to match the desired bed depth, usually 16-18 inches. Keep all cuts straight and clean for easy assembly.
Double-check your measurements before cutting to avoid wasting boards.
| Lumber Type | Measurement | Notes |
|---|---|---|
| Long Boards | 8 feet | Length for raised garden beds |
| Short Boards | 4 feet – 3 inches | Fits between corner supports |
| Corner Supports | 16-18 inches | Matches bed depth |
This guarantees your raised garden beds are sturdy and precisely built.
Drill Pilot Holes to Make Assembly Easier
Drilling pilot holes before assembly helps prevent the wood from splitting and makes screwing easier. Use a drill bit slightly smaller than your screws to guarantee a tight grip without damaging the wood.
It’s a good idea to mark your holes about an inch from the board ends. This helps keep everything aligned and secure. Doing this little extra step will save you some hassle later on!
Benefits of Pilot Holes
Although it might seem like an extra step, making pilot holes before inserting screws makes your raised garden bed assembly much easier and more reliable.
Pilot holes prevent the wood from splitting, especially when working with softer or durable wood. They guide screws into the exact spot, ensuring your structure stays square and stable throughout assembly.
By drilling pilot holes, you reduce the torque needed to drive screws, so you’ll use less effort and avoid stripping screw heads.
Plus, pilot holes improve the screws’ grip in the wood, creating stronger joints that can handle the weight of soil and plants.
Correct Drill Bit Size
Using the right drill bit size makes pilot holes even more effective when assembling your raised garden bed. For most wood types, a 1/4-inch drill bit works best, allowing screws to go in smoothly without damaging the wood.
If you’re working with hardwoods like cedar, try a slightly smaller bit—around 3/16 inch—to avoid cracking while guaranteeing the screws fit securely. Drill your pilot holes about 1 inch from the wood’s edge to maintain strength during assembly.
Choosing the correct drill bit size not only helps place screws accurately but also speeds up your work, making the whole assembly process easier and cleaner. This small step guarantees your raised garden bed will be sturdy and long-lasting.
Preventing Wood Splitting
When you pre-drill pilot holes, you greatly reduce the chance of your wood splitting, especially with dense materials like cedar or redwood. Pilot holes let screws go in smoothly without applying too much pressure. This helps prevent cracks and speeds up your assembly.
Use a drill bit that’s just a bit smaller than your screws for a snug fit. Also, try to position the holes about 1 inch from the wood edges to keep splitting to a minimum.
| Screw Length | Recommended Pilot Hole Size | Distance from Edge | Benefit |
|---|---|---|---|
| 2.5 – 3 inches | 1/8 inch | 1 inch | Prevents splitting |
| Dense woods (cedar) | Slightly smaller bit | 1 inch | Easier screw insertion |
| Redwood | Slightly smaller bit | 1 inch | Reduces wood cracking |
| All woods | Pilot holes | 1 inch | Speeds up assembly |
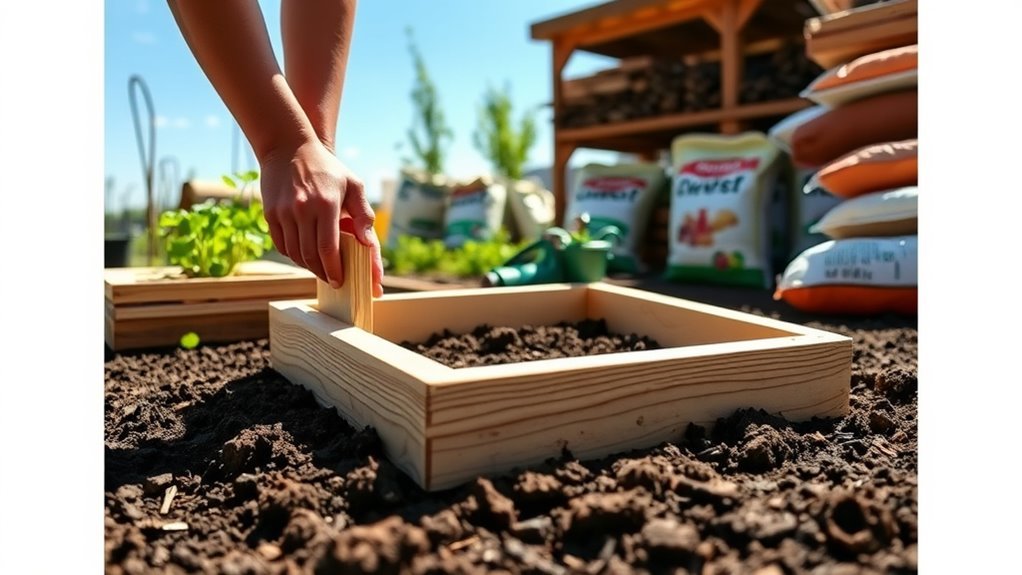
Assemble Shorter Raised Bed Sides and Square Corners
Start by cutting your shorter side boards to the right length and laying them parallel on a level surface. Use 4×4 corner posts to support the ends and keep the corners square.
Secure everything with screws, then double-check the angles with a framing square before moving on. It’s important to make sure those corners are nice and tight!
Aligning Short Sides
Lay out the two shorter sides of your raised bed on a level surface to confirm they align properly and provide stability during assembly. Position 4×4 corner posts at each end, then secure the short sides with 2.5 to 3-inch deck screws.
This step is essential for maintaining the raised bed’s structural integrity. Properly aligning the short sides guarantees your garden bed will hold its shape and last.
| Step | Emotion | Result |
|---|---|---|
| Align sides | Confidence | Stability |
| Attach posts | Satisfaction | Strength |
| Secure screws | Accomplishment | Durability |
Ensuring Square Corners
Assemble the shorter sides of your raised bed on a flat surface, using 4×4 corner supports to keep everything aligned and stable. Make sure each shorter side is the intended width minus 3 inches so the long boards fit perfectly.
To verify your raised beds have square corners, measure the diagonals from corner to corner; they should be equal. This step is essential when you build a raised garden that’s sturdy and precise.
Secure each corner with two screws per corner, which adds strength. After attaching the long boards, measure the diagonals again before fully tightening the screws to confirm the frame is square.
Taking these careful steps assures your raised bed sits solid, with perfectly square corners for a professional finish.
Attach Long Boards and Add Middle Supports
Raise the short sides of your garden bed upright and firmly attach the long boards. Make certain they align perfectly with the edges to form a square frame.
Before you attach the long boards, verify they’re cut about 3 inches longer than the short sides’ width to fit properly. Use 2.5 or 3-inch deck screws, placing two screws per end to secure each corner tightly.
Double-check that all corners form right angles to maintain a square structure. If your bed is longer than 6 feet, add a middle support beam to prevent the boards from bowing over time.
This middle support is essential for keeping your raised bed sturdy. It helps extend its lifespan by evenly distributing pressure across the long boards.
Line Raised Bed With Optional Hardware Cloth for Pest Control
To keep burrowing pests like gophers and moles out of your raised garden bed, line the bottom with 1/4-inch hardware cloth. Cut it to fit the base, extending slightly up the sides for extra protection. Secure it tightly with screws or staples, and consider burying the edges a few inches underground to block any digging attempts.
This simple step not only keeps pests away but also enhances soil drainage, improving plant health.
Visualize this process:
- Measuring and cutting hardware cloth to bed dimensions
- Securing the mesh firmly along the base and sides
- Burying edges to prevent underground entry
- Noticing improved soil aeration and drainage
Using hardware cloth guarantees a pest-free raised garden bed with healthier roots and thriving plants.
Position and Fill Raised Bed With Quality Soil and Compost
Selecting the perfect spot for your raised garden bed is essential—aim for a location that gets 6 to 8 hours of direct sunlight daily without shade from trees or buildings.
Position the bed north-south and space multiple beds at least 28 inches apart for easy access. This way, you’ll have plenty of room to move around while tending your plants.
To fill your raised garden bed, use a quality soil mix: three parts organic matter, four parts sharp sand, and seven parts topsoil. Adding compost will enrich the soil even more.
After filling, let the soil settle for a couple of weeks, and top it up if needed. This helps create the perfect growing environment for your garden.
| Step | Details | Tips |
|---|---|---|
| Position | 6-8 hrs sunlight, no shade | Orient north-south |
| Spacing | 28 inches apart | Easy access |
| Soil Mix | Organic matter, sand, topsoil | Guarantees drainage, fertility |
| Compost & Mulch | Enrich and retain moisture | Suppress weeds |
Frequently Asked Questions
What Is the Cheapest Way to Make a Raised Bed on a Budget?
The cheapest way to make a raised bed on a budget is by using reclaimed wood like pallets, filling the bottom with organic debris, and keeping the bed around 12 inches deep to save on materials and soil costs.
What Vegetables Should Not Be Grown in a Raised Bed?
Don’t plant towering giants like corn or okra—they’ll steal sunlight like greedy shadows. Avoid deep-rooted potatoes and sprawling asparagus; their roots crave freedom. Skip heavy feeders like tomatoes unless you’re ready to feed them often.
How Do You Build a Simple Raised Bed?
You start by cutting durable wood like cedar, assembling a 4×8 frame with 4×4 corner posts, and screwing it securely. Then, position it in sunlight, fill with rich soil mix, and you’re ready to plant.
How Deep Should a Raised Bed Be for Veggies?
Think of your raised bed as a cozy home for veggies—12 inches suits carrots like a snug room, while tomatoes need a mansion of 18 to 24 inches. Deeper beds let roots stretch and thrive happily underground.
Conclusion
Now that you’ve built your raised garden bed, imagine it as a sturdy cradle nurturing your vibrant plants. With every seed you plant, you’re painting a living masterpiece, bursting with life and color.
Your hands have crafted more than wood and soil—they’ve created a sanctuary where growth blooms and nature whispers its secrets. So, roll up your sleeves, immerse yourself in the earth, and watch your garden dance under the sun’s warm embrace.
Building a raised garden bed is more than just a project; it’s your gateway to a thriving, healthy garden. Whether you’re growing fresh veggies or beautiful flowers, this raised bed will give your plants the perfect environment to flourish. Get ready to enjoy the satisfaction of homegrown goodness right outside your door!