How to Sharpen Garden Shears in 10 Easy Steps
To sharpen your garden shears in 10 easy steps, start by gathering files, oil, and cleaning supplies. Having everything ready will make the process smoother and quicker.
Clean your shears thoroughly to get rid of dirt and debris before you begin sharpening.
Next, soak them in a vinegar and salt mix to remove any rust that might have built up. This step helps restore your shears to good condition.
After soaking, neutralize the acid and dry them well to prevent any further corrosion.
Choose a 10-20° sharpening angle for the best results. Sharpen the cutting edge carefully, making sure to maintain that angle throughout.
Then, remove burrs by stroking the opposite side gently.
Finally, lubricate your shears to keep them working smoothly. Test the sharpness on a piece of paper or a plant stem to make sure they’re ready to use.
Reassemble your shears, and you’re all set. Follow these simple steps, and you’ll enjoy cleaner cuts and healthier plants in no time!
Key Takeaways
- Clean and remove rust from blades using vinegar, salt, steel wool, and baking soda before sharpening. This will help get your blades nice and ready for the next step.
- Disassemble garden shears carefully to access all blade parts for thorough cleaning and sharpening. Taking them apart makes sure you don’t miss any spots.
- Maintain a sharpening angle between 10° and 20° for effective and durable cutting edges. Keeping the angle steady is key to getting a sharp edge.
- Use diamond files or a carbide sharpener, making 10-20 passes while keeping the angle consistent. Don’t rush it—steady strokes work best.
- Remove burrs from the non-tapered edge, lubricate blades, and reassemble shears for optimal performance. Once done, your shears will be good as new!
Why Sharp Garden Shears Matter
The importance of sharp garden shears lies in their ability to make clean cuts that help your plants heal faster and stay healthier. When your shears are sharp, they slice through stems smoothly, avoiding jagged edges that can crush plant tissue and invite pests or diseases.
A clean cut reduces stress on your plants and supports quicker recovery. Plus, sharp blades require less effort from you, making pruning easier and less tiring. If your shears get dull, you’ll struggle more and risk damaging your plants.
Keeping your garden shears sharp also extends their lifespan, so they perform consistently season after season. Experts suggest sharpening every six weeks to maintain that sharp edge and guarantee you’re always making clean cuts that benefit your garden’s health.
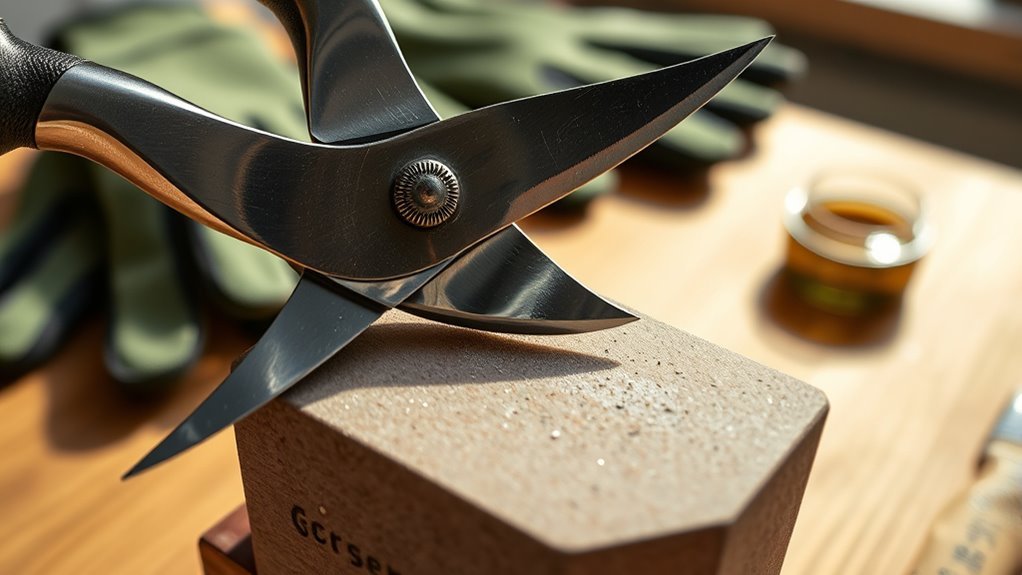
Get Your Tools: Files, Oil, and Cleaning Supplies
Before you start sharpening, gather the right tools like diamond files in various grits and cleaning supplies such as steel wool and scouring pads.
Choose a multipurpose or silicone-based oil to keep your blades lubricated and rust-free. Having everything ready will make the sharpening process smoother and more effective.
It’s way easier when you have all your stuff on hand. Trust me, it saves a lot of hassle later!
Essential Sharpening Tools
Three essential tools will make sharpening your garden shears easier and more effective: diamond files, a carbide sharpener, and multipurpose oil. Using the right sharpening tool guarantees your blades regain their edge quickly and precisely.
A diamond file, available in coarse, fine, and extrafine grades, lets you sharpen blades at the ideal 10-20 degree angle. A carbide sharpener simplifies the process by matching the blade angle and delivering consistent results.
Finally, apply multipurpose oil post-sharpening to lubricate and protect your blades from rust while maintaining cutting efficiency.
Here’s what you need:
- Diamond files (coarse, fine, extrafine)
- Carbide sharpening tool
- Multipurpose oil for lubrication
- A stable work surface for safety and precision
Cleaning Supplies Needed
Cleaning your garden shears properly starts with gathering the right supplies. You’ll need essential cleaning supplies like a glass jar, white vinegar, table salt, and baking soda to create an effective rust-removing solution.
Steel wool (#0 fine) and kitchen scouring pads help you scrub the blades thoroughly, removing rust and debris that dull performance. Keep a clean rag handy to dry the shears after cleaning and to wipe off excess moisture.
Having these cleaning supplies on hand guarantees you can maintain your shears’ condition and prevent rust from building up. With the right tools ready, you’ll keep your garden shears sharp and functional, making your gardening tasks easier and extending your tool’s life.
Choosing The Right Oil
Once your garden shears are free of rust and debris, the next step is choosing the right oil and sharpening tools to keep them in top shape. Use 3-in-1 oil for lubrication—it prevents rust and keeps blades moving smoothly without attracting dust like WD-40 does.
For sharpening, pick a diamond file or carbide tool to maintain the blade edge precisely. After cleaning and sharpening, lightly coat your blades with olive oil or a dry silicone-based lubricant for rust prevention.
Keep a clean rag handy to wipe off sap and debris before and after sharpening. It really helps to keep everything working smoothly and looking good.
- 3-in-1 oil for smooth lubrication
- Diamond or carbide sharpening tools
- Clean rag for wiping blades
- Olive oil or silicone lubricant for rust prevention
Clean Your Garden Shears Thoroughly
Start by removing any dirt and sap from your garden shears using warm, soapy water and a scrubbing pad.
If you spot rust, soak the blades in vinegar to help break it down. Make sure to rinse and dry your shears completely before moving on.
Remove Dirt And Sap
Before you can sharpen your garden shears, you’ll need to remove all dirt and sap that can dull the blades or cause rust. Start by disassembling your shears to reach every corner.
Then, use warm, soapy water and a kitchen scouring pad to scrub away grime effectively. For stubborn sap, just apply a cloth soaked in mineral spirits to loosen that sticky residue.
Finally, rinse and dry your shears thoroughly to prevent rust. Follow these steps:
- Disassemble your garden shears carefully.
- Scrub blades and handles with soapy water using a scouring pad.
- Use mineral spirits on cloth for tough sap spots.
- Rinse with clean water and dry completely.
This process guarantees you remove dirt and sap, setting the stage for a sharp, well-maintained tool.
Use Vinegar For Rust
Two simple ingredients—white vinegar and salt—form a powerful solution to tackle rust on your garden shears. Combine white vinegar with 2 tablespoons of salt in a container. Soak your shears in this mix for several hours to loosen rust from metal surfaces.
Next, scrub with steel wool or an old toothbrush to remove any remaining rust. Afterward, neutralize the acidity by soaking shears in a baking soda solution for 10 minutes.
Dry thoroughly to prevent flash rust, then apply a thin layer of multipurpose oil for protection. This little extra step really helps keep your tools in great shape.
| Step | Action | Purpose |
|---|---|---|
| 1 | Mix vinegar & salt | Create rust remover |
| 2 | Soak shears | Loosen rust from metal |
| 3 | Scrub shears | Remove rust residue |
| 4 | Neutralize with baking soda | Stop vinegar acidity |
| 5 | Dry & oil | Prevent flash rust |
Remove Rust With Vinegar and Salt
One simple way to remove rust from your garden shears is to soak them in a mixture of white vinegar and salt. This solution helps loosen the rust, making it easier to clean.
A quick rust removal tip: soak garden shears in white vinegar and salt to loosen rust for easy cleaning.
Here’s how you do it:
- Mix white vinegar with 2 tablespoons of salt in a container.
- Submerge your rusted shears and let them soak for a few hours.
- Scrub the blades with steel wool or an old toothbrush to remove any remaining rust.
- Rinse off the shears thoroughly after scrubbing.
Using this method, you’ll effectively remove rust and prepare your shears for sharpening. The steel wool helps get rid of stubborn rust without damaging the metal, restoring your tools’ condition quickly.
Neutralize Vinegar and Dry Your Shears
Once you’ve thoroughly removed rust from your garden shears using vinegar and salt, it’s important to neutralize the acidic solution to prevent further damage. Dispose of the vinegar mixture safely, then prepare a neutralizing solution by mixing about two tablespoons of baking soda per cup of water.
Soak your shears in this baking soda solution for around 10 minutes to effectively neutralize the vinegar’s acidity. After soaking, make sure to dry your shears thoroughly, removing all moisture from the metal surfaces to prevent flash rusting.
Don’t rush this step—any lingering dampness can cause corrosion. Once completely dry, immediately apply a light coat of multipurpose oil to protect your shears from rust and keep them in peak condition.
This simple process helps extend the life of your garden shears. It’s a little extra effort that really pays off!
Disassemble Garden Shears (When Needed)
Although you can sharpen your garden shears without taking them apart, disassembling them allows for a much deeper clean. It also gives you easier access to all the nooks where sap and debris hide.
To disassemble your shears for thorough cleaning and maintenance, follow these steps:
- Use a screwdriver to carefully remove screws or bolts, keeping track of all parts.
- Note the orientation of blades and springs to simplify reassembly.
- Check if your shears have a special pivot point—refer to the manufacturer’s manual for proper tools.
- Clean each component individually before sharpening to prevent contamination.
Only disassemble when needed, though. This detailed cleaning really helps boost your shears’ performance and longevity.
Select the 10-20° Sharpening Angle
Choosing the right sharpening angle is key to getting your garden shears cutting smoothly and lasting longer. Aim to select a sharpening angle between 10° and 20°, depending on the type of cutting you do.
A 10° angle is perfect for fine, delicate cuts, while a 20° angle offers extra durability for tougher branches. To sharpen the beveled edge effectively, maintain this angle consistently throughout the process.
Sharpen at 10° for precision or 20° for strength, keeping the angle steady for best results.
Using a diamond file or carbide sharpening tool helps you hold the correct sharpening angle with ease. If you struggle to keep the angle steady, consider using a guide.
Sticking to this range regularly will not only improve your shears’ performance but also extend their lifespan, making your garden work much easier.
Sharpen the Cutting Edge of Your Garden Shears
Before you start sharpening, make sure to clean the blade surface. This helps remove any dirt or sap that might be stuck on there.
Keep your file at the chosen 10-20° angle throughout the process. This way, you’ll maintain the blade’s shape perfectly.
After filing, take a moment to carefully remove any burrs. Doing this will guarantee a smooth, sharp edge every time.
Prep Blade Surface
Start by thoroughly cleaning your garden shears’ blades with warm, soapy water and a scouring pad to remove dirt, sap, and rust. This cleaning step is essential to prepare the blade for sharpening and guarantees a smooth process.
Follow these steps:
- Rinse blades after scrubbing to wash away loosened debris.
- Dry blades completely to prevent new rust from forming.
Make sure to inspect the blade surface for any remaining rust or buildup. If you spot stubborn spots, use a rust remover or fine steel wool to tackle them.
Maintain Sharpening Angle
Although it might seem tricky at first, maintaining a sharpening angle of 10 to 20 degrees is essential for keeping your garden shears cutting cleanly and lasting longer.
To maintain sharpening angle, use a diamond file or carbide sharpening tool, drawing it toward the blade’s tip and following the original bevel. This approach preserves the cutting edge’s integrity, ensuring efficient cuts every time.
For well-maintained shears, aim for 10 to 20 passes; if the blades are duller, increase to 40 to 50 passes. Regularly test sharpness by cutting through twigs—a clean cut means your angle is spot on.
Consistently maintaining the sharpening angle not only keeps your cutting edge sharp but also helps your plants heal properly by reducing damage and disease risk. So, it’s definitely worth the effort!
Remove Burrs Carefully
Remove burrs carefully to keep your garden shears cutting smoothly and efficiently. After sharpening, focus on the non-tapered edge of the blade to remove burrs with just one pass using a sharpening tool.
Burrs can reduce cutting efficiency, so addressing them promptly is essential. A triangular India stone is ideal for this task, as it maintains the correct sharpening angle while smoothing rough spots.
To remove burrs effectively, follow these steps:
- Identify rough edges on the non-tapered side.
- Use a triangular India stone for a single, gentle pass.
- Check regularly for burrs after each sharpening session.
- Clean and lubricate blades to prevent burr formation.
This careful approach guarantees your garden shears stay sharp and last longer. Taking a little extra time here really pays off!
Remove Burrs by Stroking the Opposite Side
When you finish sharpening your garden shears, gently stroking the opposite side of the blade helps eliminate any burrs that formed during the process.
To remove burrs effectively, hold the shears securely and use a sharpening tool to stroke the non-tapered side, maintaining the original blade angle. One or two light passes usually smooth out rough edges without altering the blade’s shape.
This step is essential for a clean cutting edge and prolongs your shears’ lifespan.
| Step | Action | Tip |
|---|---|---|
| 1 | Hold shears securely | Prevent slipping |
| 2 | Stroke opposite side | Use light pressure |
| 3 | Maintain blade angle | Preserve cutting quality |
| 4 | Repeat 1-2 passes | Avoid overdoing it |
Lubricate, Test Sharpness, and Reassemble Your Shears
Apply a light coat of dry or silicone-based lubricant to your garden shears’ blades to prevent rust and keep them operating smoothly. Lubricate all moving parts, and consider using bicycle chain lubricant once a year for extra protection.
Next, test sharpness by cutting through a twig. If you get a clean cut, you’re good to go. But if the edges are jagged, you’ll need to sharpen them some more.
Finally, carefully reassemble your shears, making sure all screws are tight to keep everything stable.
- Apply lubricant to blades and pivot points
- Use bicycle chain lubricant annually
- Test sharpness on a twig
- Reassemble and tighten all screws
Regularly lubricate and test sharpness to keep your shears efficient and long-lasting.
Frequently Asked Questions
What’s the Best Way to Sharpen Garden Shears at Home?
You should clean your shears, then use a diamond file at a 10-20 degree angle, making smooth, curved strokes toward the blade’s tip. Finish by lubricating to prevent rust and keep them sharp longer.
Will Cutting Aluminum Foil Sharpen Scissors?
Yes, cutting aluminum foil can sharpen your scissors slightly by creating a micro-edge on the blades. It works best for light maintenance, but don’t rely on it for severely dull scissors or heavy sharpening needs.
How to Make Shears Sharper?
You’ll sharpen shears best by cleaning them first, then filing the blades at a 10-20 degree angle with a diamond file. Afterward, oil the blades to prevent rust and test sharpness on small twigs.
Is It Worth Sharpening Garden Shears?
You’ll see crisp, clean cuts slicing through stems like a hot knife through butter. It’s definitely worth sharpening your garden shears—it saves effort, keeps plants healthier, and extends your tool’s life, making every snip count.
Conclusion
Sharpening your garden shears is like tuning a fine instrument—it keeps your tools singing through every cut. By following these simple steps, you’ll bring back their precision and ease, making pruning a breeze.
Remember, a sharp blade not only protects your plants but also saves your effort and time. Keep your shears clean, sharp, and oiled, and they’ll reward you with years of reliable, effortless gardening.
Regularly sharpening garden shears helps maintain their cutting power, making your pruning tasks smoother and more efficient. Plus, sharp tools reduce damage to your plants, promoting healthier growth. So, take a little time to sharpen your garden shears—it’s a small effort that pays off big in the long run. Happy trimming!