7 Steps to Lay Sleepers for Garden Edging
To lay sleepers for garden edging, start by planning a symmetrical layout. Measure and mark your area carefully to ensure everything lines up perfectly. This initial step helps create a neat and professional-looking border for your garden.
Next, gather all your tools and materials before you begin. Clear and level the ground, then dig a shallow trench where the sleepers will sit. Taking the time to prepare the base properly makes a big difference in how stable your edging will be.
Position and level the first sleeper carefully. Using a string line for alignment keeps everything straight and tidy. Secure the sleepers with timber stakes or rebar pins to hold them firmly in place.
Stack more sleepers if you want extra height and stability. Once your sleepers are in position, finish by sanding and sealing them to protect against weather and wear.
Keep going to uncover tips for creating long-lasting, neat garden edges that really stand out.
Key Takeaways
- Measure and mark a clear centerline using a string line to ensure straight sleeper placement.
- Dig a shallow, level trench about 25–50mm deep to securely seat the sleepers.
- Place sleepers snugly in the trench, checking alignment and level with a spirit level.
- Secure sleepers with timber stakes or rebar pins spaced evenly every 1 to 1.5 meters.
- Seal sleepers with two coats of weatherproof sealant for durability and protection against decay.
Plan a Symmetrical Garden Edging Layout With Sleepers
Before you start placing sleepers, measure the area carefully to define a clear centerline for your garden edging. This step helps you create a symmetrical layout that enhances your garden’s visual appeal.
Use a string line to mark straight edges or gentle curves, ensuring the edging stays a consistent distance from garden beds or pathways. When cutting sleepers, trim end pieces to fit the design neatly. This way, you avoid awkward short sections that disrupt symmetry.
Mark edges with a string line and trim sleepers neatly to maintain smooth, symmetrical garden edging.
Stick to a consistent pattern—whether horizontal or vertical—to strengthen the garden’s structure. As you lay each sleeper, regularly check its alignment and keep it level.
These careful measures guarantee your garden edging looks sharp, balanced, and professionally finished throughout the entire project. Taking your time here really pays off!
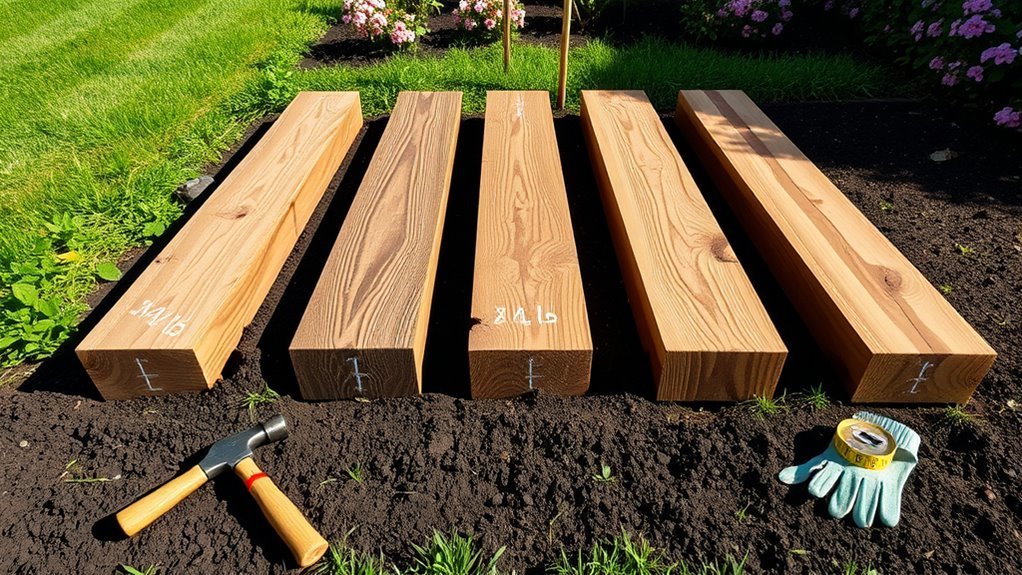
Gather Tools and Materials for Sleeper Edging
A well-prepared toolkit and the right materials make installing sleeper edging much smoother. First, gather tools and materials like a spade, rake, wheelbarrow, string line, spirit level, and a reliable cutting tool such as a circular saw or handsaw.
You’ll also need landscaping screws or galvanised plates to secure the sleepers firmly. When laying sleepers for garden edging, don’t forget timber stakes and rebar pins to stabilize your setup.
Protect your wood by applying a wood preservative to prevent decay and weather damage. Safety gear, including gloves and goggles, is essential while handling and cutting heavy sleepers.
Make sure to measure your garden area carefully to determine the exact number of sleepers needed. That way, you’ll have everything on hand for a smooth, efficient installation.
Prepare the Ground and Dig a Shallow Trench
Clear the area of plants, stones, and debris to create a smooth surface for your sleepers. Next, level the ground thoroughly to avoid any unevenness that could cause instability.
Once the ground is even, dig a shallow trench about 25–50mm deep, making sure it’s wide enough for your sleepers to fit properly. This trench will act as a stable foundation and help prevent shifting over time.
While digging, regularly use a spirit level to check the trench depth and alignment. Keeping the base even and horizontal is key.
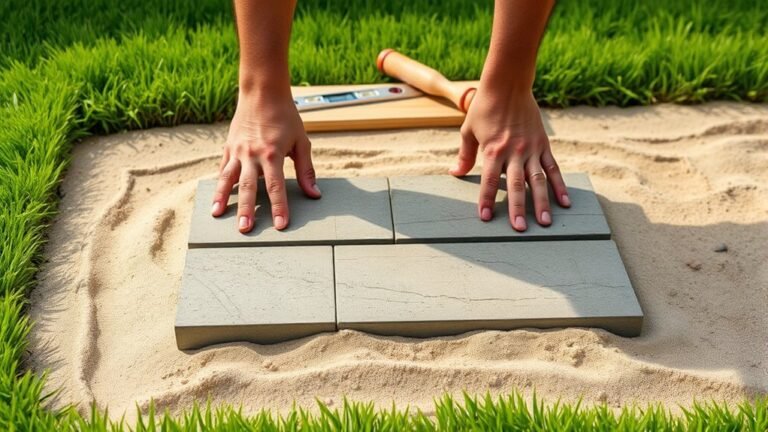
Position and Level the First Sleeper Accurately
Start by placing the first sleeper carefully in the trench, making certain it fits snugly without gaps underneath. Use a spirit level to confirm it’s perfectly horizontal and align it with a string line for a straight edge.
Double-check both ends for consistent height before securing it firmly in place. This way, you’ll have a solid, level foundation to build on. Just take your time to get it right!
Accurate Sleeper Placement
When you position the first sleeper accurately, you set the foundation for a straight and level garden edging. Accurate sleeper placement guarantees uniformity throughout your project, making the rest of your sleepers easier to lay.
Start by digging a shallow trench about one-third the sleeper’s height to provide stability. Then, use a string line to align the sleeper perfectly along your marked path. Finally, check the sleeper’s horizontal position with a spirit level to verify precise alignment.
- Lay the first sleeper in the shallow trench, confirming ends meet your layout marks.
- Align it carefully to the string line to maintain a straight edge.
- Use the spirit level to confirm the sleeper is perfectly horizontal.
This careful setup guarantees your garden edging stays neat and consistent. It really makes the whole process smoother, trust me!
Ensuring Level Alignment
Although it might seem straightforward, positioning and leveling the first sleeper accurately is vital to guaranteeing your garden edging looks professional and stays stable over time.
As the first step when you lay sleepers for garden edging, clear the area of debris, stones, and plants to create a smooth surface. Dig a shallow trench about one-third the sleeper’s height to secure it firmly.
Use a spirit level to verify the sleeper is perfectly horizontal, adjusting as needed. Align the sleeper with a string line to keep edges straight or mark curves for intricate designs.
Regular verification of level alignment is essential as you add more sleepers to maintain uniformity and prevent future misalignment. Taking these steps sets a solid foundation for your garden edging project.
Secure Sleepers Using Timber Stakes or Rebar Pins
Drive timber stakes or rebar pins behind each sleeper to keep them firmly in place. To secure sleepers effectively, you’ve got two solid options: timber stakes or rebar pins. Both act as anchors, preventing soil movement and enhancing stability.
Drive timber stakes or rebar pins behind sleepers to anchor them firmly and prevent soil movement.
Here’s how to do it right:
- Pre-drill holes in timber stakes to avoid splitting, then fasten each stake with galvanised screws behind the sleeper.
- Alternatively, drill holes into the sleepers and drive rebar pins through these holes deep into the ground.
- Space your stakes or pins evenly, around every 1 to 1.5 meters, especially on slopes or near soil beds, to maintain consistent stability.
Stack Additional Sleepers for Height and Stability
To build height and stability, stack your sleepers carefully, making sure each layer is level using a spirit level. Fasten the layers securely with timber screws to keep everything in place and prevent shifting.
Make sure to stagger the joints like bricks. This helps evenly distribute weight and strengthens the whole structure. It’s a simple trick that really makes a difference!
Layering Sleepers Securely
Stacking sleepers securely requires careful layering to guarantee both height and stability. When creating a raised garden edge with sleepers, follow these steps to keep each layer secure and level:
First, dig a shallow trench for each layer. Make sure the base is level and well-compacted so the sleepers sit evenly and don’t wobble.
Next, stagger each additional sleeper layer to prevent any vertical movement. Then, secure them together using timber or landscaping screws to keep everything aligned and sturdy.
Don’t forget to use a spirit level often. This helps confirm each layer is perfectly horizontal, which avoids uneven surfaces that can mess up the look and stability of your raised bed.
Ensuring Structural Stability
Achieving solid structural stability starts with staggering each sleeper layer to prevent vertical alignment that could weaken the build. When stacking additional sleepers for height, make sure each layer is staggered to maintain structural integrity.
Secure the sleepers firmly with landscaping screws, which minimize movement and create a strong bond between layers. Always use a spirit level to check each layer’s horizontal alignment, ensuring uniform height and preventing uneven settling.
Begin by placing the first sleeper layer in a shallow trench; this provides a stable base and reduces shifting over time. If your garden is on a slope or soft ground, drive steel rod pins through the sleepers into the soil to anchor the entire structure firmly, enhancing stability and longevity.
Sand and Seal Sleepers to Protect Your Edging
Start by sanding your sleepers to smooth out any rough edges and remove splinters. This makes your garden edging safer and way more visually appealing. It also helps protect both your hands and the wood itself.
Next, seal the sleepers to shield them from moisture and UV damage. This step really extends their lifespan. Use weatherproof sealants or stains designed for outdoor wood, and apply two coats for the best protection.
Before sealing, make sure the sleepers are clean and dry. This helps the sealant stick better and last longer.
- Sand sleepers thoroughly to remove splinters and rough spots.
- Apply a weatherproof sealant or stain in two coats for maximum moisture protection.
- Reapply sealant every few years to maintain your sleepers’ durability and appearance.
Frequently Asked Questions
Can I Lay Sleepers Directly on Soil?
Yes, you can lay sleepers directly on soil, but you’ll want to remove turf and debris first. Dig a shallow trench and loosen the soil to help keep them stable and level for a lasting garden edge.
How to Lay Sleepers as Lawn Edging?
Picture a neat border framing your lawn; you clear, dig a shallow trench, lay each sleeper level, and secure them with stakes. Then, fill gaps with soil or gravel for a tidy, stable garden edge you’ll love.
Should Sleepers Be Laid on Sand or Gravel?
You should lay sleepers on sand or gravel to guarantee stability and proper drainage. Both provide a level base, prevent moisture buildup, and reduce movement over time, helping your garden edging stay neat and durable.
How to Join Sleepers in a Straight Line?
You cut sleepers squarely, you align them carefully, you secure them firmly. You use a spirit level, you fasten with galvanized screws, you pre-drill holes to prevent splitting. You check alignment constantly to keep them straight.
Conclusion
Now that you’ve laid your sleepers with care, your garden edging will stand the test of time. Remember, measure twice and cut once—taking your time upfront saves headaches later.
With proper planning, leveling, and securing, you’ll create a neat, sturdy border that enhances your outdoor space beautifully. Don’t forget to sand and seal for lasting protection.
Your hard work will pay off, turning your garden into a true labor of love. By following these steps to lay sleepers for garden edging, you ensure a durable and attractive finish. This simple process not only boosts your garden’s curb appeal but also provides a functional edge that lasts through seasons. Enjoy the satisfaction of a professional-looking garden border that’s both practical and pleasing to the eye.