How to Make a Garden Gate in 5 Simple Steps
Start by measuring your gate opening carefully, allowing extra space for latch installation. This step is crucial to ensure your garden gate fits perfectly and functions smoothly.
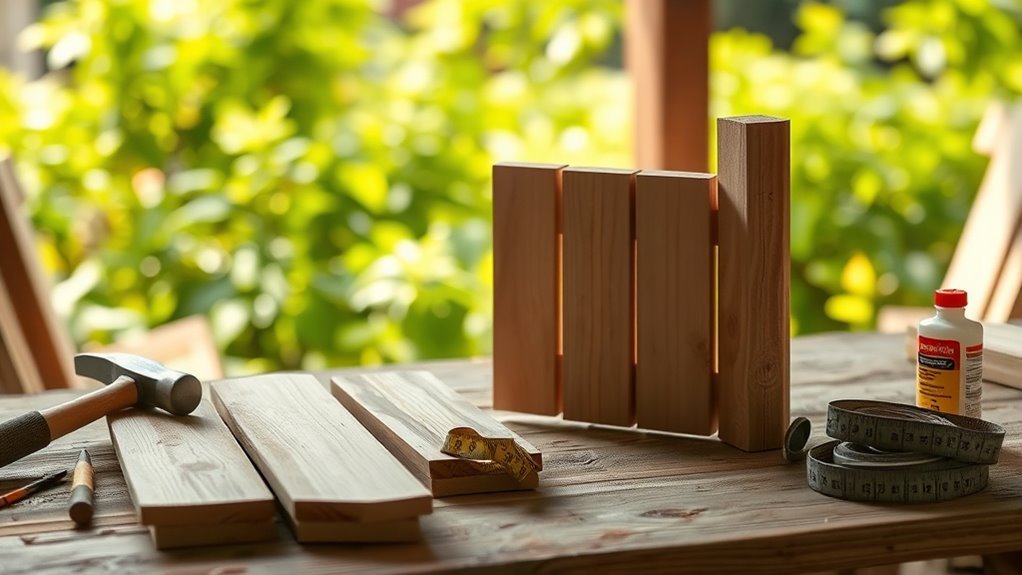
Next, choose durable pressure-treated wood and prepare it by cutting the frame and facing pieces. Using sturdy wood helps your gate withstand weather and last longer.
Assemble the gate frame, making sure it’s square and reinforced with braces. This will give your gate strength and stability.
Attach the vertical boards securely, then add cross and angle braces for extra support. These braces keep the gate solid and prevent sagging over time.
Finally, install hinges and a locking device, then hang your gate. Check that it opens and closes smoothly without any issues.
Keep going to discover tips that make the process even easier and more precise. You’ll be enjoying your new garden gate in no time!
Key Takeaways
– Measure the gate opening accurately, subtracting for clearance and adding space for latch installation.
This step is super important to make sure your gate fits just right.
– Select durable pressure-treated wood, cut frame and facing pieces, and prepare tongue-and-groove joints.
Choosing the right wood helps your gate last longer, especially outdoors.
– Assemble the frame squarely, adding cross and angled braces for strength and stability.
Take your time here to make sure everything lines up perfectly.
– Attach vertical boards securely with pre-drilled holes, clamps, and additional cross braces for reinforcement.
This will keep your gate sturdy and looking good for years.
– Install hinges, pivots, and locking hardware, then adjust the gate for smooth and secure operation.
Make sure it swings nicely and locks up tight for safety.
Measure and Plan Your Garden Gate Dimensions
Start by measuring the width of the opening between your fence posts and subtract one inch to secure a snug gate fit.
Make sure to check both the top and bottom widths of the opening to confirm they’re equal. This helps you avoid an uneven gate.
Check both top and bottom widths to ensure your gate fits evenly and functions smoothly.
When deciding on gate width, remember to add extra space if you plan to install a latch or lock—usually 3/4 to 1 inch more.
For height, consider the existing fence or previous gate height. It’s often around 80 inches for privacy gates next to an 8-foot fence.
Use a reliable measuring tape and be sure to measure twice to verify your numbers.
Trust me, careful measuring and planning now will save you time and effort during construction.
Select and Prepare Your Garden Gate Wood
After measuring and planning your gate dimensions carefully, the next step is to select the right wood for your garden gate. Choose sturdy 2×4 MicroPro Sienna pressure-treated wood for durability and cost-effectiveness.
You’ll need five pieces for the frame and eight for the facing. Measure and cut the wood accurately—top and bottom pieces to the gate’s width, vertical supports to its height.
Use a table saw to create 3/4-inch grooves in the 2×6 boards for tongue-and-groove joints, which add strength. Prepare all cuts in advance, including angle braces, to guarantee precise fitting.
When cutting fence boards, leave a half-inch gap for ground clearance to prevent moisture damage. Use wood glue along with fasteners to secure joints for a strong garden gate.
Build the Garden Gate Frame
Once you’ve cut your 2×4 boards to size, assemble the frame by joining the top and bottom pieces with the vertical supports using pocket holes and screws. Start by attaching the vertical supports at each end. Make sure the frame is square by measuring diagonally from corner to corner.
Next, add a cross brace horizontally across the midpoint of the frame for extra support, securing it with screws. To increase stability, cut an angled brace to fit diagonally between two corners and attach it using pocket holes. This cross brace will help prevent sagging over time.
Double-check all joints are tight and the frame remains square before moving on. With these steps, you’ll have a sturdy, well-supported garden gate frame ready for the next phase.
Attach Garden Gate Boards and Add Reinforcements
Align the vertical boards carefully with the marked horizontal positions on your gate frame before securing them with screws. Pre-drill holes to avoid splitting the wood, then use two screws per board on both sides for stability.
Use a pipe clamp to hold boards firmly in place while fastening. Add a cross brace between horizontal boards for extra support. For increased durability, attach angle braces snugly in corners, securing them with screws.
Though you’ll attach your hinges later, make certain the frame is sturdy enough to support them. Here’s a quick guide to reinforcement options:
| Reinforcement Type | Purpose |
|---|---|
| Cross Brace | Structural support |
| Angle Brace | Corner durability |
| Double Screws | Prevent warping |
| Pre-drilled Holes | Avoid wood splitting |
| Pipe Clamp Usage | Hold boards in place |
Install Gate Hardware and Hang the Garden Gate
Begin by securely drilling and bolting the hinges to your gate frame, making certain they’re properly aligned to allow smooth opening and closing.
Next, visit your local home improvement store to pick up a locking device and pivots. Use a spanner to screw in the pivots tightly, guaranteeing your gate stays stable.
Install the locking device to enhance both security and functionality. After hanging the gate, make sure to check its movement carefully, looking for smooth and unobstructed operation.
If you notice any misalignment or unevenness, make final adjustments so the gate is level within the opening. Taking these steps guarantees your garden gate operates effortlessly and remains secure for years to come.
Frequently Asked Questions
How to Build a Simple Gate Step by Step?
You start by measuring the opening, then cut 2x4s for the frame. Assemble the frame with screws, add boards and a cross brace, sand, stain, and finally install hinges and a latch to complete your gate.
How to Make a Small Garden Wooden Gate?
Think of building a small garden gate like crafting a sturdy book—you’ll cut a frame from 2x4s, attach vertical boards, add a cross brace to stop sagging, then paint and hang it with hinges and a latch.
What Is the Cheapest Gate to Install?
The cheapest gate to install is a simple wooden gate made from pressure-treated 2×4 lumber. You can build it yourself using basic materials, keeping costs as low as $30 or even less with reclaimed wood.
How Far Apart Should Posts Be for a Gate?
Picture two sturdy posts standing 3 to 4 feet apart, framing your garden gate perfectly. You’ll want this spacing to support the gate’s weight and guarantee smooth swinging, blending strength with style effortlessly.
Conclusion
You’ve just learned to build a garden gate in five simple steps—who knew it could be that easy? While you might have expected a complicated DIY disaster, you’ve actually got a sturdy gate ready to impress.
Now, instead of waiting for the perfect gate to magically appear, you’ve made one yourself. So go ahead, enjoy the satisfaction of a job well done—because who needs store-bought when you can build better?
Building your own garden gate not only saves money but also lets you customize it to fit your style and space perfectly. With these simple steps, creating a durable, attractive gate is totally within your reach. So grab your tools, get started, and transform your garden entrance today!