How to Build a Small Garden Pond From a Container in 5 Easy Steps
You can easily build a small garden pond using a watertight container placed in partial sun with afternoon shade. This simple container pond is perfect for adding a touch of nature to your garden and attracting local wildlife.
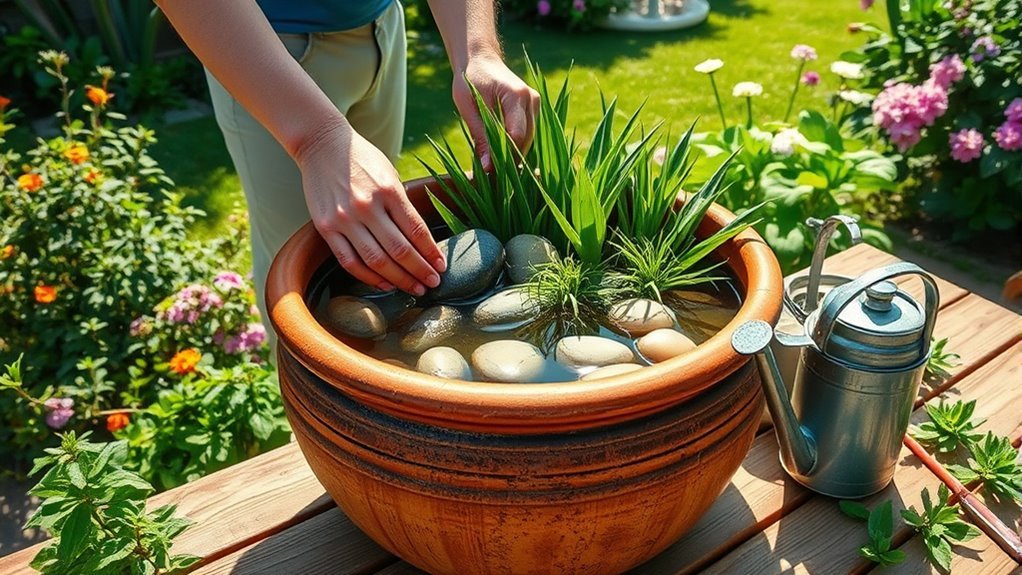
Start by layering potting soil, gravel, and sand to provide nutrients and keep the water clear.
Next, add wildlife ramps so frogs and other creatures can get in and out safely. Plant an odd number of native aquatic plants suited to a 20-30 cm depth—this helps create a natural, balanced look.
Fill your pond with rainwater for the best results, decorate it naturally, and keep an eye on water levels. Remember to trim the plants as needed to keep your little habitat thriving.
Keep going to uncover tips for a vibrant, thriving pond habitat!
Key Takeaways
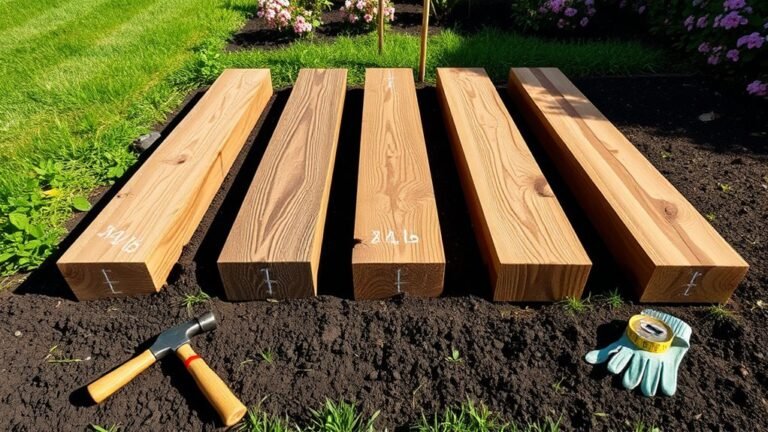
– Select a watertight container, about 18 inches wide and 5-8 inches deep.
Place it in a spot that gets partial sun with some afternoon shade.
– Start by layering the bottom with potting soil, then add gravel.
Top that with sand or fine gravel to help provide nutrients and keep the water clear.
– Add a mix of 3-5 native aquatic plants.
Choose a combination of submerged, floating, and marginal plants that do well in 20-30 cm of water.
– Fill your pond with rainwater for the best natural quality.
You can decorate with stones or driftwood, and if you like, add a mini bubble fountain for some aeration.
– Keep up with regular maintenance by topping off the water as needed.
Trim dead leaves, clear out excess algae, and watch for any invasive species that might sneak in.
Choose the Right Container and Location for Your Container Pond
Choosing the right container and location sets the foundation for a thriving container pond. Start with a watertight container, like a galvanized tub, at least 18 inches wide and 5-8 inches deep, to allow easy wildlife access.
A watertight container, 18 inches wide and 5-8 inches deep, ensures easy access for wildlife.
If your container isn’t waterproof, line it with a pond liner to hold water. Position your pond in a spot with partial sun—aim for about four hours of sunlight daily but provide afternoon shade to reduce evaporation and algae.
Line the container’s bottom with gravel to create depth variations for plants. Pick a location that’s easy to reach for simple maintenance, like topping off water and checking plant health.
Avoid front yards for safety, and choose a spot where you can enjoy watching wildlife thrive around your new pond. It’s all about making it convenient and enjoyable for you!
Prepare Your Container Pond With Soil Layers and Wildlife Ramps
Before filling your container pond with water, start by layering the bottom with a mix of potting soil and gravel about 1 cm deep. This will provide nutrients for your aquatic plants.
Next, cap this with 2 cm of clean play sand or fine gravel to keep the soil layers contained and the water clear. Make sure your container pond is watertight—use a pond liner or marine sealant if needed.
Create wildlife ramps with stones or bricks for easy access. This will make your pond a wildlife-friendly habitat.
- Use nutrient-rich soil layers for healthy aquatic plants
- Add clean play sand to reduce water cloudiness
- Confirm the container pond is fully watertight
- Build ramps to support frogs and other wildlife
Finally, fill with rainwater to keep your wildlife pond safe and natural.
Select and Plant Suitable Aquatic Plants for Your Container Pond
Selecting the right aquatic plants brings life and balance to your container pond. When choosing plants for your mini pond, include a mix of plant types: submerged plants like hornwort, floating plants such as American frogbit, and marginal plants to create a healthy ecosystem.
Opt for native water plants like cardinal flower and swamp milkweed to boost biodiversity and support local wildlife. Plant an odd number of water plants—three, five, or seven—to guarantee proper spacing and visual appeal.
Make certain your container pond is at least 20-30 cm deep to accommodate roots and provide a suitable habitat. And don’t forget to regularly trim dead leaves and monitor plant growth to maintain a thriving, balanced environment in your container pond.
Fill Your Container Pond With Water and Add Decoration
Once you’ve planted your aquatic greenery, fill your container pond with rainwater to keep the environment chemical-free and healthy. Make certain the water level covers the rims of your potted water plants, so their roots can absorb nutrients properly.
Adding decorative elements not only beautifies your mini garden but also provides shelter for wildlife.
To enhance your container pond:
- Introduce an odd number (3-5) of water plants, mixing submerged, marginal, and floating types.
- Use stones or driftwood as natural decorative elements.
- Consider a mini bubble fountain to oxygenate the water.
- Ensure the pond water stays clean and balanced to support plant health.
These steps help create a vibrant, thriving habitat in your container pond. Give it a try, and watch your little water garden come to life!
Maintain Your Container Pond for a Healthy Wildlife Habitat
Maintaining your container pond requires regular attention to keep the environment healthy and inviting for wildlife. You’ll need to maintain water levels by topping off with rainwater, especially during hot weather, to prevent evaporation and excess nutrients.
Remove excess pond weeds or algae to balance the ecosystem and avoid water contamination. Trim fading or dead leaves from pond plants to promote a healthy environment and encourage new growth.
Consider adding a mini bubble fountain for aeration. This oxygenates the water and supports aquatic life.
Finally, keep an eye on invasive species that could outcompete native plants. This helps ensure your pond remains a diverse habitat.
These steps help create a thriving container pond that supports a sustainable, flourishing wildlife ecosystem.
Frequently Asked Questions
How to Build a Small Garden Pond From a Container Easily?
Choose a watertight container, place it in partial sun, fill with rainwater, add native aquatic plants, and create varied depths using stones. Maintain by topping off water and monitoring plant health regularly for a thriving small pond.
Can You Make a Pond Out of a Bucket?
Can you really make a pond out of a bucket? Absolutely! You just need a watertight container, some aquatic plants, and the right spot with partial sunlight. It’s simple, fun, and perfect for small spaces!
Do Container Ponds Need a Pump?
You don’t always need a pump for container ponds, especially if they’re small. Adding a pump helps with aeration in larger ponds, but regular maintenance and plants often keep your water healthy without extra equipment.
How to Make a Garden Pond for Beginners?
Creating a garden pond is like painting with nature—you just pick a sturdy container, add water and plants, place it where sunlight’s gentle, and keep it clean. You’ll watch wildlife visit and enjoy your peaceful oasis grow!
Conclusion
By building your own container pond, you’re not just creating a beautiful space—you’re nurturing life and balance right in your backyard. The idea that small actions can’t make a big impact isn’t true here; even a tiny pond supports wildlife and promotes ecosystem health.
So, don’t underestimate your power to foster nature’s harmony. With a little care, your container pond becomes a thriving habitat, proving that every small step counts in making a greener world.
Creating a small garden pond from a container is a simple yet powerful way to enhance your outdoor space. It attracts birds, frogs, and beneficial insects, helping to build a balanced ecosystem. Plus, it adds a peaceful, natural touch to your garden.
Remember, even a small garden pond can make a significant difference. By choosing to build a container pond, you’re contributing to biodiversity and supporting local wildlife. It’s an easy, enjoyable project that brings nature closer to home and encourages a healthier environment for all.